Today we talked about 3D modelling.It is a new skill for me to study.
• 3D Theory – Components of a 3D object
• 3D Theory – Polygons, Triangles and Face Normals
• UV Mapping
• Materials & Textures
• Material Graph
• Textures being applied to the material
• Shaders
• Lighting Types – UE4
3D model is comprised by stereoscopic polygon in a three-dimensional space; Vertices, Edges and Faces have a numeric value in X Y & Z space.
Polygons are the surface of a solid object. A Polygon is as surface with at least 3 straight lines (triangle, square, N-Gons). N-Gons are polygons that are made up of 5 or more edges. They are always changed to Triangles or Quads for avoiding rendering and animation issues during making models. (The prime choice is Quads.)
UV mapping is a flat mapping from the surface of the three-dimensional model. U and V mean the X and Y axis.
The main Textures we will be covering are Albedo maps and Normal maps. The Albedo maps correlate with the materials. The Normal map is a grey image which can be used as a figure for the concave and convex surface. The surface of the models are always divided into different textures and by 2 sizes of pixels.
Metallic maps. They determine the metallic look of the model . Roughness Maps: can help control how rough and textured the material is.
Shader (shaders) is an operated program on 3D objects. Through this program, we could gain the majority of the graphics. A typical 3D scene, generally contain multiple Shaders.
The lighting types include : directional lights, point lights and spot lights,giving you different ways of lighting models and different shade combinations.
——————
[2015.12.03] First try – lamp
Today I used Maya2017 in the class and learnt the basic operation and shortcut key of Maya, e.g. Q (Select Tool), W (Move Tool), and R (Rotate Tool). After that I started to make a polygon for practice.It was good fun when I was making my first lamp, although difficult at times as I did make many mistakes at first. I would like to find an online course so I can learn more about it.
——————
[2015.12.07] UV Mapping
There are 3 types of UV projections they are ,Planar Projection, Cylindrical Projection and Automatic Projection.
Checker patterns can help us to check whether the UV map is neat, and the model surface can be filled with the upcoming map. You can freely change UV. and it will not change the external structure of the model.
UV Packing will make our UV mapping looks clearer. It will help us apply more easily to image and check the texture. Then we use textures with a 2D form on UV map. Blank places do not affect the map but make our work much easier.
Tileable textures allow us to set 2 or more different UV parts on a map. This method is more convenient but sometimes an obvious repletion.
By checking Texel density, you can discover how many Texel's per meter you need for each object. Then you can adjust as much as you want.
——————
[2015.12.10]Frist try – UV
Today we learnt how to make UV in Maya. I applied different projections on my cube to try to understand how to make them. I enjoyed this subject and learnt something very interesting .
After class I'm still intrigued, I try to find some more information or an online course to try to understand it more. I also search YouTube looking for technique I research late into the evening until tiredness forces me to to sleep.
——————
[2015.12.17]First try – Barrel
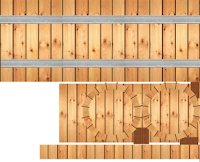
Today I use Photoshop to draw a texture on a barrel, I added natural colour and made some shadow and light on it. I then added some images to it and tried to make it look more interesting.
After that I made other UV examples for my homework, because I would like to practice my skill and make it better.
——————
[2016.01.04&07] Advance Modelling
Subdivision surface is defined as the limit of an infinite subdivision process. It can produce a series of subdivision surfaces to make models more closely to what you want.
Edge loops conveniently help us to make one or more complete circulation line.
Topology is rewriting edges for the model, and the purpose of rewriting is to make animation easily.On 7th February we applied our subdivision knowledge from the lecture and practice making something like these reference diagram to understand how to use Edge loops and to assist us when making our creations.
We use 1 and 3 buttons repeatedly to check whether our models are reasonable, and made the model achieve a higher quality by adding or deleting surface. (E.g. make sure the face is correct in order to change shape successfully.) Organic comparison is used for the smooth surface of the object. Hard surface is often used in the performance of sharp texture, such as mechanical.
——————
[2016.01.14] retro phone
This is the first time I have tried to build a telephone model in the classroom. But I'm not very good at this. So I tried 3 times to make sure that I was able to control them.
I spend many hours on this making it look as accurate as I can with use of the reference diagram.
I often used the tool of Extrude, to make my model more effective and geometric with less faces. I would like to complete on a low modulus level. For example, when I built a model I usually use an 8 face basic polygon to start. This ensures my model is built by Quads and a circle structure. At the same time I can also add whatever face I want to my model so that it can reach the standard of high modulus.
These images are in screenshot under the smooth conditions (keyboard 3). I repeated the use of keyboard 1 and 3 to check whether my model is good enough . Also I can better grasp the skills of my operation.
I made the handrail an integral part of my design. Because this method can make the model more effective to reduce the useless face. Also it can ensure my model is stable. I also didn't need to use too much time in adding or reducing the face in each of the individual geometry.
I didn't want to add any textures to my model until later, because I wanted to learn more about the material. I would not my work to appear it was done in haste. So I will complete my work when I'm happy with it's construction.
——————
[2016.01.18] Baking
Baking can increase the effect of the texture map, and make the model looks more precise by adding the details. It is in order to get close to the physical texture. It is important when we need to get the performance of high modulus on a low modulus base.
Baking can increase the effect of the texture map, and make the model looks more precise by adding the details. It is in order to get close to the physical texture. It is important when we need to get the performance of high modulus on a low modulus base.
Raycasting is a rendering technique to create a 3D perspective in a 2D map. (Direct algorithm based on cages.) From the image of each pixel, a ray of light is emitted along a fixed direction (usually in the direction of view), light travels through the entire high modulus cages, and obtains the colour information on its progress. Until the light travels through the entire cages, finally we will get the colour. You could render the low modulus cages by using this information to make a similar visual effect.
——————
[2016.01.21] UE4 & XNormal
Soften/Harden will make the selected edges or models become soft or hard according to their own point of view. We must separate our UV into different parts each time we change it. Whether soft or hard, it has no effect for the normal model.
XNormal is a free production of normal mapping software. In use it is not only to support the grey bump map or displacement map be converted to normal map, we can also directly use the model to generate a variety of textures. XNormal supports many models and image formats. In addition to support many advanced parameters. Such as object/tangent space, multipart loading, swapping cords and so on.
 In UE4, we can create a "parent" material. It is one of the main materials and we can create multiple variants (children, which are also known as the instance of the material). Because 'child' does not use the extra memory space, so we can make all kinds of materials in the condition of saving memory space.
This is the first time I used UE4. The first feeling it gave me was it was very complex. I even began to wonder if I could control it. We first added a finished normal map to UE4, and then added more copies to it making us proficient in how we operated it.
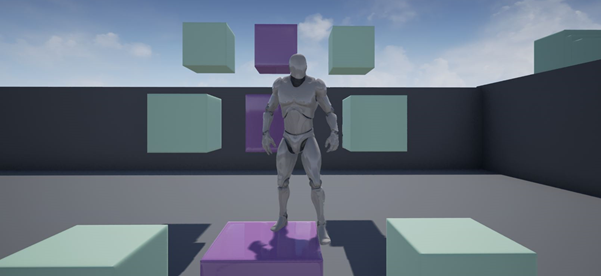
Finally I tried to make some changes. I modified these objects out of cubes into the existing material ball. I used the Normal map and by attaching other objects had a wonderful effect on it. For example, the floor looks like a floor tile, also it makes the stairs look like a semi-finished product. I hope that in the future I will be able to skilfully operate this software and makes my work better and better.——————
[2016.02.18-02.26] Maya & Zbrush

we tried to make a pillar. First of all, we made the basic graphics in Maya. Then imported it into Zbrush to depict details. For some reason I couldn't use Zbrush with other students, so I decided to try it alone when I at home.
We learnt how to use the Zsphere on Monday. After I got home, I tried to set up a branch with the same method. I think the Zsphere is very useful, especially if I need to make a character model and it can help me to build a good basic for me quickly.
——————
[2016.02.29-03.04] Low poly & UV.
Today we tried to improve the low modulus exported from Zbrush. I must to select the face which need to be connect together with the protype. I'm not good at it so the first time I failed, even UVmap is very mess.
I tried to make it again when I got home. Finally I finished it before I go to sleep. But I'm still not very good at it so I think I need to try more.
[2016.04.14] Marmoset Toolbag 2.08
Today we learnt how to use Marmoset Toolbag 2.08 to adjust view settings, add a map and materials, rotating video tips of the model production. I think this is useful, especially when I collected my works set in the future.
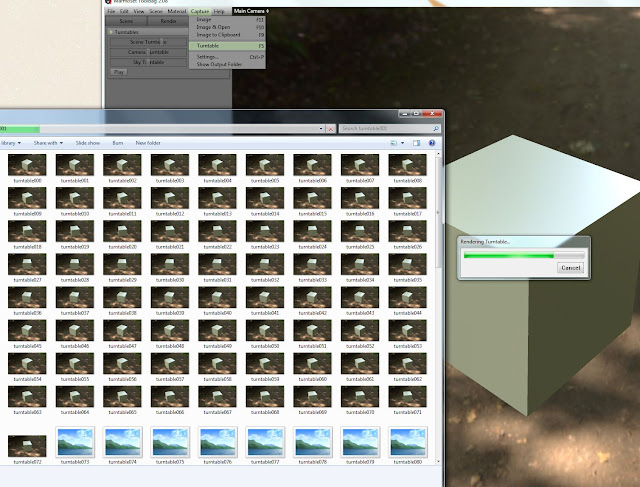
This is just the screenshots of making the rotating video. We will be introduced these pictures into Phothshop to video. When I returned home I used my own computer to review how to make GIF and video.


没有评论:
发表评论